
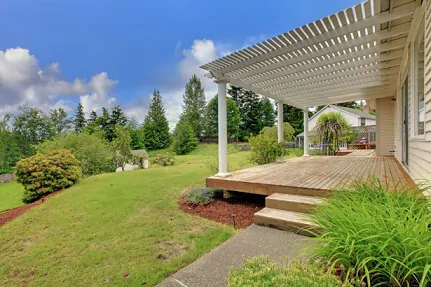
A rotted deck post feels like a death sentence for your whole deck. It isn’t.
In most cases, you can swap out a single post, or even just the damaged section, without touching the rest of the structure. Here’s exactly how to do it, what to watch out for, and when to call someone.
First: Is It a Repair or a Full Replacement?
Grab a flat-head screwdriver and press it firmly into the post near the rotted area. If it sinks in more than about a quarter inch, the wood fibers have broken down, and the rot is active.
- Small, localized soft spot? You might be able to repair it with epoxy filler and wood hardener.
- Rot at the base running more than a few inches up, or the post looks hollow? Replace it.
- Rot in multiple spots on the same post? Don’t patch it. Replace it.
The rot you can see is rarely all of it. Once moisture gets inside a post, it works from the inside out. What looks like surface damage can be hiding a nearly hollow core.
Why Posts Rot at the Base (And Why It Keeps Happening)
Most deck posts rot at the bottom, right where they meet the concrete footing.
Here’s why: concrete is porous. It soaks up rainwater and holds it. If your post is sitting directly on concrete, or worse, buried in concrete, the wood stays wet at the base almost permanently.
Even pressure-treated posts sitting on a concrete footing can rot if they’re close enough to the ground, because the moisture never fully escapes.
The fix isn’t just replacing the post. It’s also making sure the new post doesn’t sit directly on the concrete. More on that below.
What You’ll Need
- Two hydraulic or screw jacks (bottle jacks work fine)
- Scrap 2×6 or 4×4 lumber for temporary bracing
- Reciprocating saw
- Pressure-treated lumber (match your existing post size, typically 4×4 or 6×6)
- A metal post base/standoff bracket (Simpson Strong-Tie makes solid ones)
- Concrete anchors and a drill
- Wood preservative (copper naphthenate works well)
- Exterior structural screws or bolts
Step 1: Brace the Deck Before You Touch Anything
This is the step most DIY guides rush past. It’s the most important one.
Before you cut or remove any post, the load it’s carrying needs to go somewhere else temporarily.
Build a simple temporary support beam from two 2x6s screwed together. Slide it under the deck joists on either side of the post you’re replacing and prop it up with jacks. Make sure the jacks are sitting on firm, level ground.
The entire piece should not drop more than 1/16 of an inch once the post is cut; if it drops more than that, your temporary support isn’t strong enough.
Don’t skip this. A deck with a missing post and no temporary support can shift or sag and damage beams, joists, or the ledger connection to your house.
Step 2: Remove the Rotted Post
Once the temporary supports are holding the load, cut the old post out with a reciprocating saw.
If it was buried in concrete, you may be able to pull the rotted wood out by hand; heavily rotted posts come out easier than you’d expect. If there’s stubborn material left in the footing hole, use a drill with a spade bit to break it up, then vacuum out the debris.
Clean the top of the footing thoroughly. Remove all dirt, debris, and loose concrete before moving on.
Step 3: Set the New Post the Right Way
This is where most replacement jobs go wrong the second time around.
Do not set the new post directly on the concrete, and definitely don’t bury it in concrete. Instead, use a metal standoff post base, a bracket that bolts into the footing and holds the post an inch or so above the surface.
That small air gap makes a massive difference. It lets the base of the post dry out after rain instead of staying wet indefinitely.
Knowing how to attach deck post hardware correctly is the key here. The post base needs to be anchored to the footing with concrete screws or expansion bolts, not just wedged in place. Set the bracket, let any fresh concrete cure fully if you poured new material, then drop the new pressure-treated post into the bracket and fasten it per the manufacturer’s specs.
Step 4: Treat and Seal the New Post
Before the post goes in, coat the bottom end with a wood preservative like copper naphthenate. Let it soak in for at least 10–15 minutes.
After installation, seal all cut ends and any exposed wood grain. End grain is the most vulnerable spot; water enters wood much faster through the end of a board than through the side. Most homeowners skip this step, and it’s exactly why posts rot prematurely.
A Note on Permits
Replacing a structural deck post often requires a permit, depending on where you live.
It’s not just red tape; it’s how you make sure the repair is done to current code, which matters both for safety and for your homeowner’s insurance. Check with your local building department before starting.
When to Call a Professional
Some situations are outside the DIY lane:
- The rot has spread to the beam sitting on top of the post
- Multiple posts are compromised at once
- Your deck is elevated more than 6 feet off the ground
- You’re not sure where the load is going, especially if there’s a covered structure over the deck
In those cases, the risk isn’t worth saving a few hundred dollars. Teams like South Shore Deck Builders handle exactly these structural repairs and can assess the full scope before any cutting starts.
How to Prevent It From Happening Again
- Keep soil and mulch away from post bases, leave at least 6 inches of clearance
- Make sure water drains away from footings, not toward them
- Trim plants and shrubs near the deck so air can circulate
- Inspect post bases every spring, catch soft spots early, and they’re a quick fix, not a half-day project
One rotted post doesn’t mean a new deck. Most of the time, it means an afternoon with a jack and a saw. Do it right, brace first, upgrade the footing setup if needed, and use a standoff bracket, and the new post will outlast the one you pulled out.